
When searching for topics for this column, I tend to focus on something that I love or that brings back fond memories, something I have been curious about and want to explore, or something new to me—but definitely not new (in our thousands of years of history, humans have cooked just about every food in every combination with every technique imaginable or possible—truly new in food seldom occurs). I was recently musing on the fried pies my mother would make, and I realized I had never actually cooked one. And there you have it, my topic
Fried pies (aka hand pies, fry pies, and turnovers, among other names) have probably been around since humans first made a paste of some type of ground grain with which they could encase a more delicate food to protect it while cooking. They may or may not have eaten the casing. Creativity and refinements happen, the most successful being passed on from generation to generation, and the next thing you know, we have delicious little pastries that are portable, extremely versatile, and relatively simple to prepare. They can be made with almost any type of dough—from flaky pie crust to many-layered puff pastry to sturdy hot-water pastry to what my mother used—canned biscuits. I have even had delicious fried pies made from pizza dough. The fillings—and the crust—can be sweet or savory, or both. They can be shallow fried in a skillet, deep fried, something between the two, or even baked (safer if you worry about the filling exploding, or if you are counting calories). You can go full-on country and first cook bacon and/or sausage in a skillet, then cook the pies in the rendered fat—a particularly delicious option, especially if one doesn’t make it a daily habit.
For fruit-filled fried pies, any type of cooked fruit or jam will work. My mother occasionally used prepared cherry pie filling (my grandmother would use mincemeat, but that isn’t as easy to come by these days), and even chunky applesauce or pumpkin butter could work. I am currently fond of a pear-vanilla-lemon combination that is easily and quickly prepared and perfect for the season. I hope you’ll enjoy my topic du jour and make it your own.
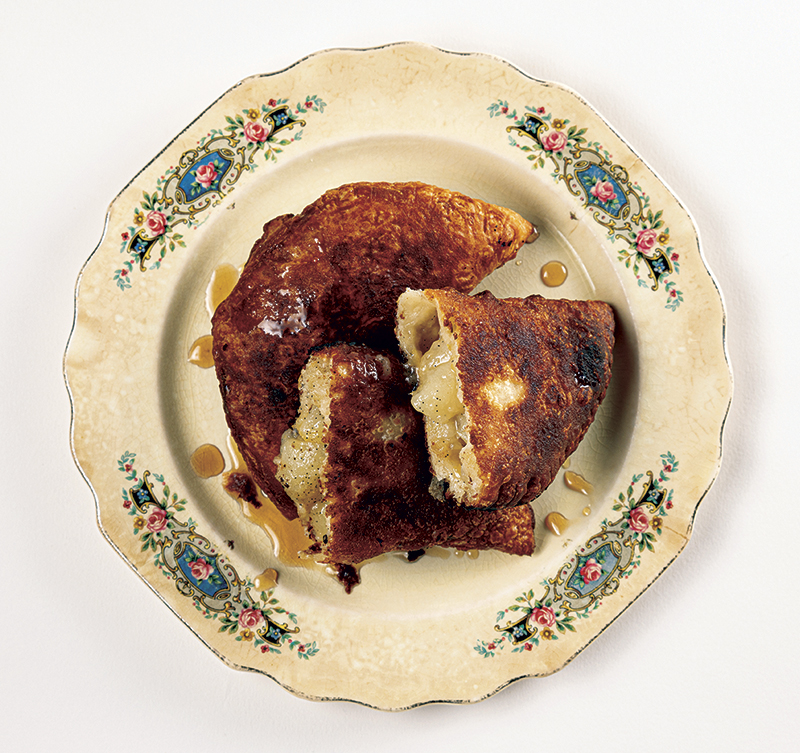
Vanilla-Pear Fried Pies
Prepare the filling by peeling, coring, and dicing 3-4 firm but barely ripe pears (fully ripe and they will dissolve into a purée, which is okay but not ideal). Heat a wide skillet and add about 2 tablespoons of butter, the pears, ¼ cup of sugar, the zest and juice of a whole lemon, and half a vanilla bean split open to allow the seeds and flavor to escape into the pears (the vanilla bean is an extravagance, but it really makes the pears sing). Cook rapidly until the pears are tender and the juices thickened (it should almost be gone—completely reduced to a glaze on the pears). Set this aside to cool. Note that you could just stop here and eat the pear mixture spread on toast, pancakes, or waffles—even ice cream! It is delicious all by itself.
For the dough, I use essentially whatever dough I have at hand (pizza, puff, pie, etc.), but if I’m making it from scratch, I would make a quick biscuit dough as follows: Cut 6 tablespoons cold butter into ¼ inch pieces and place them in the freezer while you assemble the ingredients for the dough. Put 2 cups of all-purpose flour, 2 teaspoons baking powder, ½ teaspoon baking soda, and ¾ teaspoon of salt into the bowl of a food processor. Briefly pulse the flour mixture. Add the cold butter and pulse a few times until some of the butter is beaten up (you should still see lots of bits). Pour 1 cup cold buttermilk over the mixture and quickly pulse 6 to 8 times until the mixture mostly comes together. It will not yet be a smooth dough. Allow the dough to rest for a few minutes. Turn the dough out onto a well-floured surface, patting into a square, pushing any extraneous bits of dough into the mass. Dust a rolling pin with flour, then roll the dough out to a 10 by 10-inch square. Dust off excess flour, then fold the dough in half top down, then fold left to right so you have a small square. Roll this out again into a 10 by 10-inch square. Repeat the process. This next time, roll the dough into an 8 by 16-inch rectangle. Again dust off any excess flour. Cut the dough into 8 squares (2 rows of 4-inch squares). Brush the edges lightly with water, then put a dollop (about 2 tablespoons) of the pear filling into each square. Fold the squares diagonally corner to corner to make triangles (or in half to make rectangles), pressing the moistened edges together firmly. Next, crimp the sealed edges with a fork, then turn the pie over and crimp the opposite side (I know this seems excessive, but it really helps keep them from bursting when they cook).* In a large skillet, heat a 1/4-inch depth of vegetable oil and/or butter (or use rendered bacon fat) until a bit of dough dropped into the skillet sizzles. Dust off any excess flour, then carefully place as many of the pies as will fit comfortably—not touching—in the skillet. They need to cook about 5 minutes on each side until the dough is a deep, rich golden brown with a few darker spots here and there. Remove them to a paper towel-lined platter and keep them in a warm oven while the remaining pies cook.
Serve the pies warm, perhaps drizzled with a little maple syrup (and the bacon) for breakfast, or with a scoop of ice cream for an afternoon snack when life seems overwhelming and you need a hug. Feel free to experiment with fillings and doughs, making your own refinements to pass on to your friends and family. Perhaps one of them will be inspired to write about it someday.
*If you want to take mom’s shortcut, use a good quality canned biscuit dough, rolling each biscuit out to about 6 inches in diameter before proceeding with filling the pies.
In Your Pantry: Pears
A workhorse of the fall and winter fruit pantry, pears are complicated, in that despite years of breeding (often to the detriment of flavor), they are still fragile and must be handled with care. In our area, pears mature in mid to late summer, but because they store well, acceptably good pears can be found throughout the cooler seasons. Because pears are easily damaged, they are most frequently sold (exceedingly) unripe in grocery stores. Keep this in mind if serving or using in a recipe calling for pears at a certain ripeness. Seldom are they ready to use immediately when coming from the farmers market or store. Allow them to set out at room temperature (in a paper bag if you’re in a hurry) until the aroma awakens and the texture reaches desired tenderness–there should be a slight give at the neck. To slow down ripening, store pears in the fridge, although the flavor and aroma will fade over time. Ripe pears go downhill quickly, so keep an eye on them. There are many varieties of pear but they tend to fall into two categories: European and Asian. Here are some of the most common varieties found in area supermarkets.
 Bartlett
This pear is potentially one of the best pears to eat out of hand, one with the best “pear” flavor and silky, fine-grained texture. When perfectly ripe (the skin turns from a dusky brownish green to a mottled yellow, sometimes with a hint of blush, and the pear gives slightly to the touch), Bartlett pears are occasionally available in a red variety. Good for salads when firm-ripe. Also known as the Williams pear.
 Bosc
Bosc
The pear with the sexy shape, Bosc pears are one of the best pears for cooking. They poach well, and their elegant curves lend beauty to many desserts. They are a firm pear, even when ripe, and they come in a range of hues, so don’t judge ripeness just by the color of the skin.
 D’Anjou
Not the most flavorful of pears, but valuable because of their extremely (for a pear) sturdy nature. They store especially well and can be found in groceries year round. Although pale green and yellow varieties are usual in our stores, they are the most common variety of red-skinned pear.
 Asian
Asian
Always round, with a very crisp-firm texture. Asian pears are wonderful for salads where their texture and sweetness play well off other ingredients. Their flavor is very mild and they store well in the fridge. Asian pears are also called apple pears or sand pears (due to an almost “sandy” quality of their texture).